I hope you all enjoyed old stuff day. I know I did. Special thanks to Thor for checking in on me and a double special thanks to Thor for keeping the idea alive.
While I had the day off from creating new content, I got a crazy amount of work done on the Vindicator. Crazy I tell you!
Sorry in advance for the picture quality - I was in a bit of a hurry and I didn't stop to double check my photos or break out the light box. Kind of kicking myself since the pics I do have make it hard to appreciate the progress and overall affect. Enough whining! Onward!!
 |
| Pre-shading with Tamiya JN Green. Probably the most tedious step. |
 |
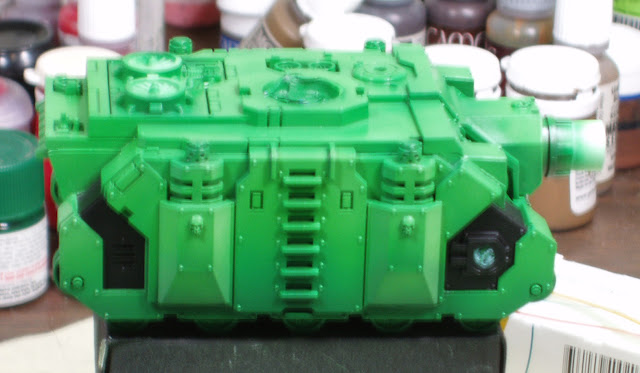
| Then I moved on to a solid base coat of Tamiya Green. No fancy color name her. Tamiya Green is all bid'ness. |
 |
| Here I begin the gradient for my pseudo color modulation. Tamiya Park Green steps in and the color accuracy in the pics steps out. |
 |
| Each step takes less and less time. Tamiya Light Green was relatively quick and easy. |
 |
| I mixed in some White to soften the bug green color I had created. Note to self: buy Tamiya gloss white. The flat white on top of the glossy greens played havoc with my color perception. |
Once I had the gradient set, I gave the whole model several coats of Tamiya clear green to tie all the colors back together and bring the highlights back to the shade of green I wanted.
 |
| I then hand painted some black call out. This really makes the model pop IRL. |
 |
| I finished off the day with a solid start on the oil washes to bring the detail back out. |
I know it doesn't look like much, but I cranked away on this thing for HOURS today. I also managed to get my custom decals printed out, but the pictures aren't all that interesting - let alone illustrative.
Day 7 should see the application of decals and rest of the oil washes for sure. The chipping is also on deck along with the rust streaks. I may even have time to paint up the metallic bits, but there's a small matter of process I have to think about.


Looks good man, though I might suggest a couple of labour (time) saving tips...
ReplyDeletethe black. - try this, spray it first, then mask over it, with tape, frisk maskol, even blu-tak works (though silly putty leaves less residue) whatever you use for masking, then have at the green, it'll be quicker and easier, i promise.
second.. and this one might not go down well... with how heavy that base coat is.. you didn't need to pre-shade.
in my experience pre-shading is only worth it if your next few layers are both lighter in colour and semi-transparent. now it might be the pics, but that base coat looks very similar in tone to the preshade, and looks like it totally wipes it out.
if that's not the case irl, or if you just like what pre-shading does anyway then i'll back off politely, but for my money, i can see where there is visible base coat on the finished model, but the preshade's gone :)
Looking really good so far buddy. Keep it up!!!
ReplyDelete@karitas: that's a good tip on the black. I had actually considered that for this model, but all the extra parts the vindicator kit adds to the basic rhino (especially in the front) made masking not worth it (in this case) in my mind.
ReplyDeleteas to the pre-shading - sadly, I think you have the right idea. You're correct, the pictures aren't doing it justice (the tones are very different), but most of the pre-shading IS gone. Though I may still keep it around for the bottom of the hull.
@Frontline: Thanks!
Looking great, my friend.
ReplyDelete